Breaking edges with brush displacement
Adjust the workbench image filter and compare its effect on outlines, shading, and small details.
Stylized rendering / Part 2 / Michael Rowe Jones
A paper texture over a render can add grain without changing an object's outline. Here, a brush texture also changes where the shader reads colors from the image, making the outline uneven.
The experiment uses a captured view of the homepage workbench and its painterly shader. You can compare the effects on the same image. Testing them during a camera move requires the live scene.
The original Blender file contains a brush displacement setup that was disconnected from its final output. Its active compositor applies a paint filter and glare. The browser uses a different filter, based on the displacement idea.
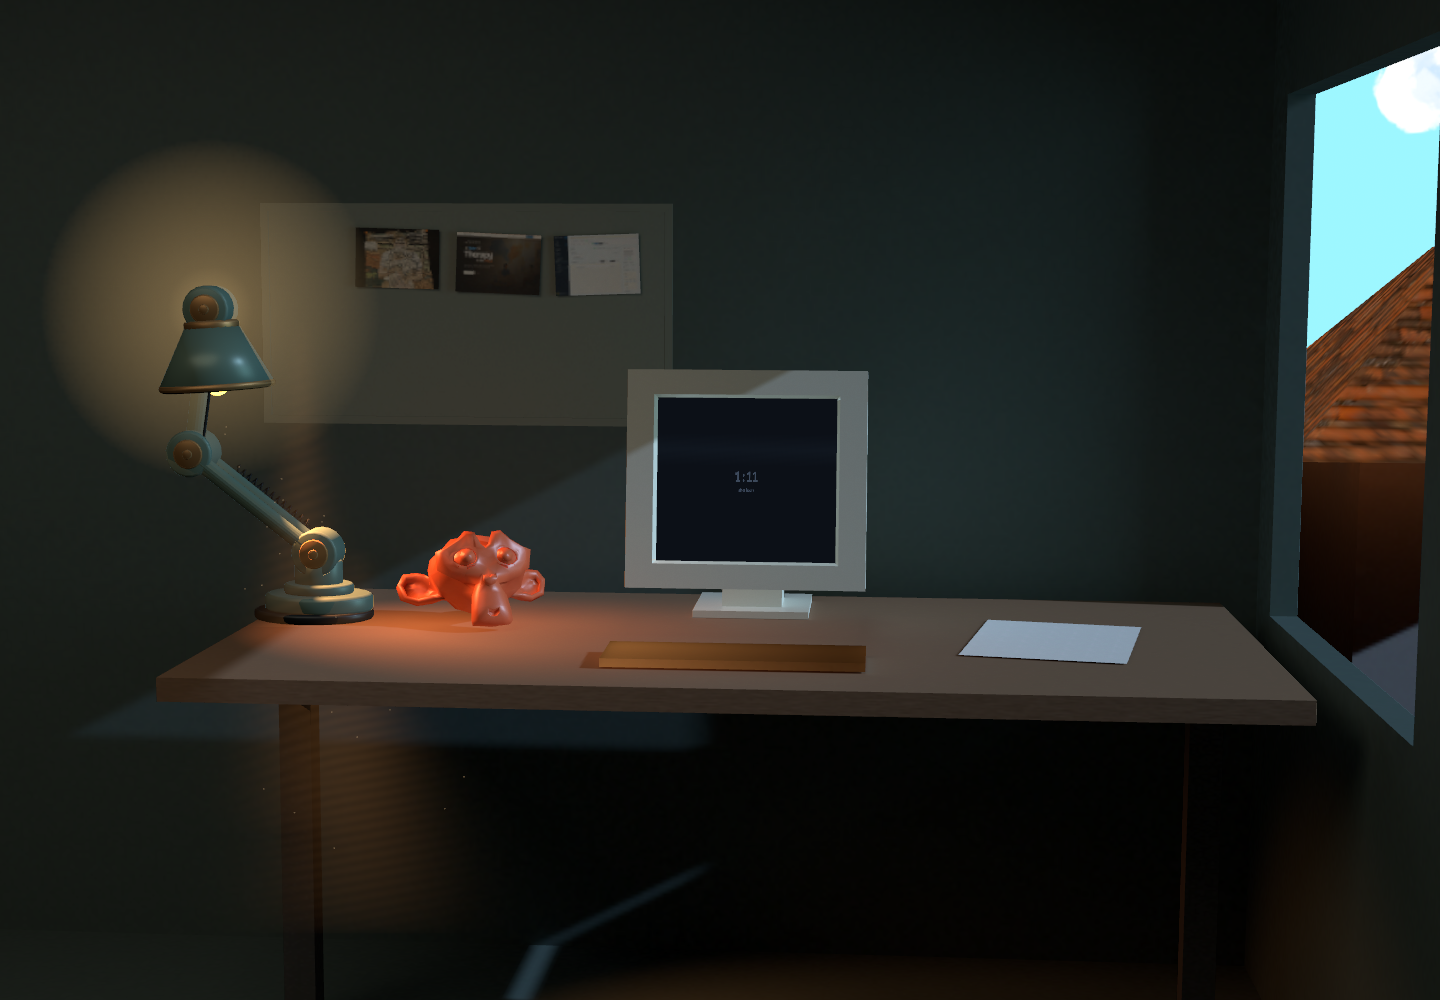
Load the experiment to change the effect on this image.
How image displacement works
An image shader calculates a color for each output position. It can copy the input color at that position, or read from somewhere else. Displacement adds an offset to the position before reading the color. The model stays in place while the output image changes.
Consider a dark lamp against a pale background. A sample just outside the lamp returns the background color. Move the sample inside the lamp and that output pixel becomes dark. If neighboring samples move by different amounts, the lamp's outline becomes uneven.
This example shows the sampling operation. The complete shader also controls the brush pattern and protects the monitor text.
// Coordinates are normalized. The brush channels contain direction data.
vec2 direction = texture(brushMap, brushUv).gb * 2.0 - 1.0;
vec2 offset = direction * displacementPx / viewportCssSize;
vec2 sampleUv = clamp(uv + offset, halfTexel, 1.0 - halfTexel);
vec3 color = texture(sceneColor, sampleUv).rgb;
The green and blue channels store horizontal and vertical offsets. The shader converts values between zero and one into values between minus one and one, allowing movement in either direction.
Displacement strength is measured in CSS pixels. Dividing it by the displayed viewport size converts it into the normalized coordinates the sampler uses. The same setting therefore moves a sample by the same displayed distance on screens with different pixel densities.
Clamping keeps a sample within the image. The full shader also reduces displacement to zero near the frame boundary, which avoids stretching the last row of pixels across the border. Large offsets can still distort thin objects inside the frame. A wider render followed by a crop gives the filter more room at the edges, but cannot recover detail lost inside the image.
Displacement, smoothing, and pigment
The workbench filter combines three operations. Use the treatment controls to compare them separately.
Displacement changes outlines. Smoothing reduces small color variations inside a shape. Pigment varies the brightness according to the brush texture. In Texture only mode, the color changes while the outlines stay in place.
For smoothing, the shader reads four overlapping groups of samples around the displaced position. Brightness changes in nearby pixels guide the direction of those groups. The shader favors groups with less color variation, then reduces the smoothing where it would change the original color too much. This reduces small shading variations while preserving stronger edges.
This filter uses a small number of samples. The anisotropic Kuwahara method by Kyprianidis, Kang, and Döllner analyzes local edge direction more fully. The shader here does not reproduce that method.
The monitor text needs less distortion than the surrounding scene. A mask reduces the treatment inside the screen, preserving the text while leaving the bezel and other objects affected.
The live hero also records each visible surface's distance from the camera. This depth information helps it reject smoothing samples from another surface. The image experiment has no depth buffer, so it cannot make that check. It shares the brush and color operations with the hero, but not the complete compositor.
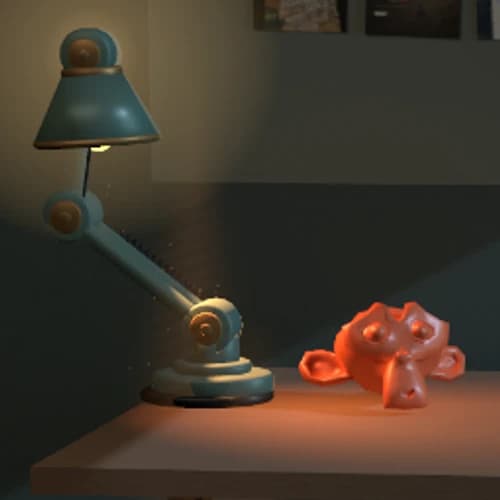
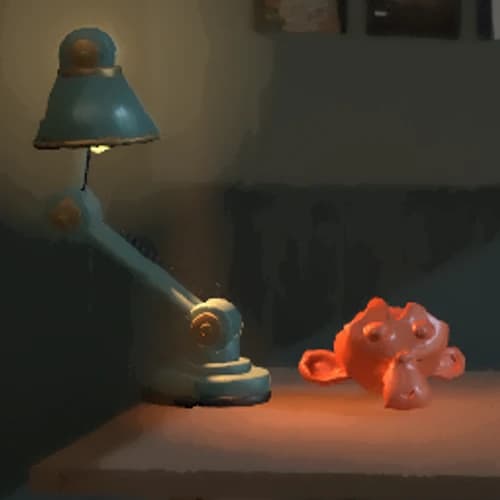
Test the settings on a thin object
Start with the lamp's upright support. It is easier to lose under heavy displacement than the broad desktop.
- Select Untreated and inspect the support and the gap beside it.
- Compare Texture only with Displacement only. Watch for changes to the support's outline.
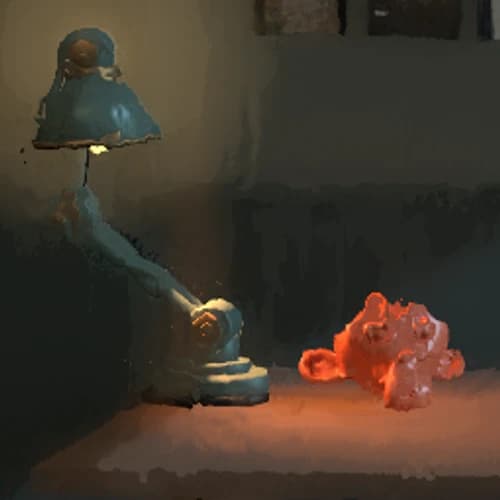
- Increase Edge displacement until the support becomes difficult to distinguish. Reduce it until you can follow its shape again.
- Select Painted and increase Smoothing radius. Check whether the lampshade still appears curved as its shading becomes simpler.
- Repeat with a narrower browser window. The same displacement in CSS pixels affects a larger proportion of the smaller image.
Record the settings and what changed. For example, note where a gap closed or a highlight disappeared. Save a comparison of the last acceptable setting and the first one that lost the detail.
Keep the input and color handling fixed when comparing settings. Three.js converts display color textures into a linear color space for rendering. The brush direction texture contains numerical offsets, so it must skip that conversion. Otherwise the conversion changes the offsets. The Three.js color-management guide explains how to mark each kind of texture.
The Blender comparison
The source file's active compositor applies a directional Paint Filter and Glare. Its brush displacement group was disconnected when this study began.
A separate copy connects the displacement group before the Paint Filter at strength 1. The group's internal sharpening is disabled so it does not affect the comparison. Both renders use the same camera, Eevee, 32 samples, and a 960 by 540 output. The original Paint Filter already produces most of the visible paint marks. Adding displacement makes a smaller change to the outlines.
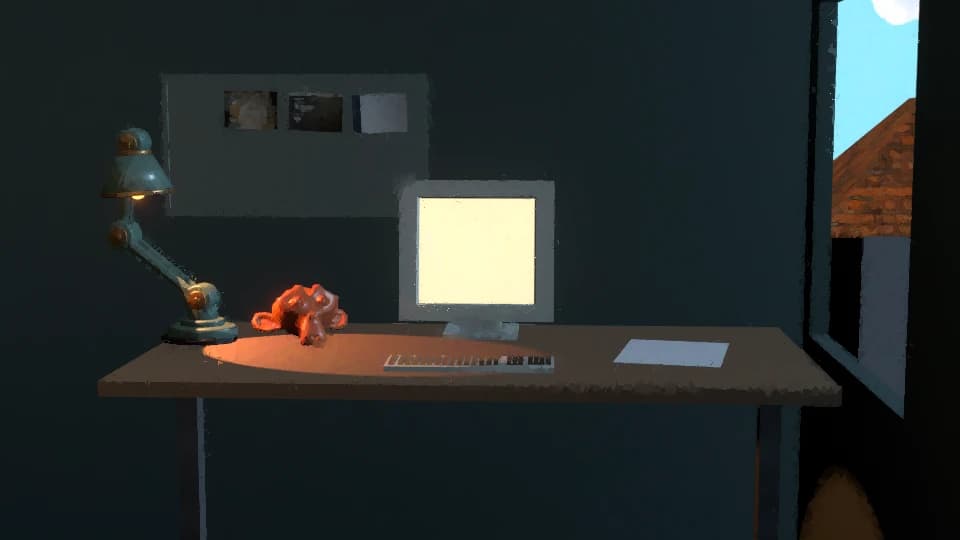
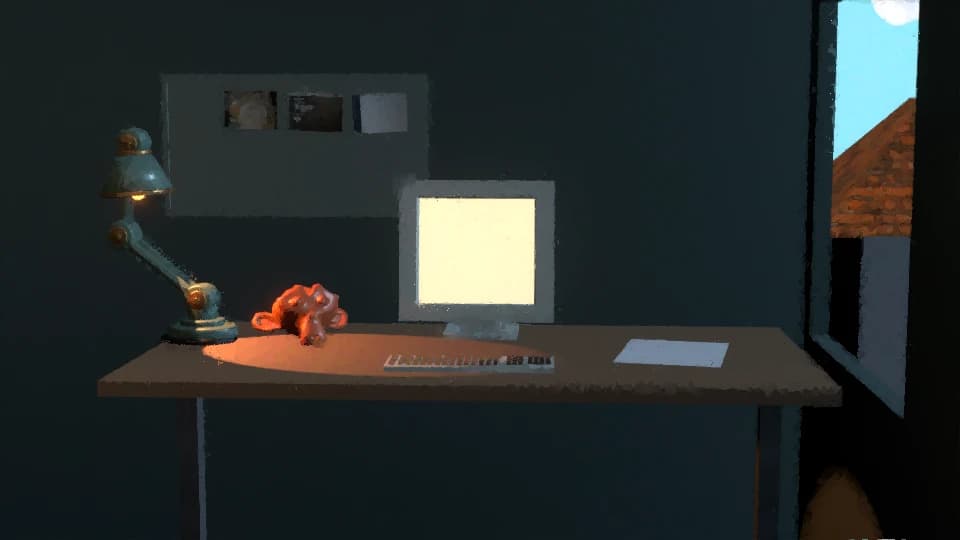
The browser's filter does not reproduce Blender's full directional filtering. The screen content differs too. Blender uses the authored screen material, while the website supplies live content. These images help compare the two approaches, but they are not matching renders from equivalent pipelines.
Camera movement and rendering cost
The brush texture stays fixed between frames. This avoids flicker caused by a changing random pattern, but the strokes are still fixed to the screen rather than the objects.
Watch the sculpture's outline during a slow camera move in the live scene. As it passes through the fixed brush pattern, different parts of the outline receive different offsets. The edge can appear to crawl. Keeping marks attached to an object requires information about the scene or its movement. Research on coherent stylization examines ways to keep marks consistent while objects move.
This study also does less work than the hero. It applies the filter to a loaded image; the hero first renders the 3D scene. Timing the study alone would omit that rendering cost.
After adjusting the filter on the still image, check the live scene. Look for disappearing lamp parts, distorted text, and edges that flicker during movement.
Maxime Heckel's On Crafting Painterly Shaders explains directional filtering in more detail. Its interactive comparisons inspired the format of this series. The workbench, controls, and filter shown here come from this site's implementation.